|
 |
 |
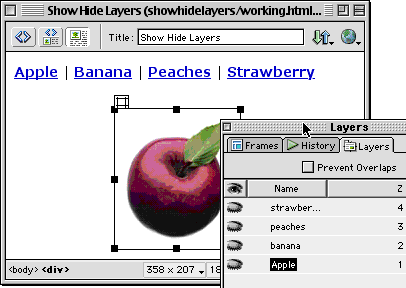
Step 10: Aligning the Layers
After Previewing in my Browser, I notice that
the layers/images are kind of all over the place and not very
cleanly organized. In this final section, we'll align our layers
to be centered
both horizontally and vertically to each other.
- Determine
where you want the images to be. I'm going to use the center of
the nav bar as a guide, and about an inch down.
- Make
one of the layers visible by clicking on the layer. The layer
will only be temporarily visible. We're just using it to assist
us in determining where we want to align the layers.
- Click
on the Apple layer and drag it into position.
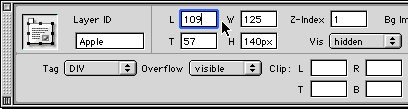
- Once
in position, notice the coordinates of the layer by going up to
the Properties Inspector and making a note of the L (left) and
T (top) numbers.
- In this
example it is L:109 and T:57. Now, either remember the those number
for the positioning or write it down (remember 2 numbers? no way!)
- Click
away from the layer to deselect it.
Step 11: Repositioning the Banana Layer
- Select
the next layer, in this case it's the Banana Layer. Don't worry
about moving it
- Go up
to the Properties Inspector and in the T and L fields, input the
numbers you wrote down (or remembered) into their respective fields
and hit enter.
- This
moves it to the same position as the Apple Layer without having
to fuss with moving it manually.
 In
case you wanted to manually move it, you can either drag the layer
as you did with the Apple Layer or you can use your arrow keys to
nudge it one pixel at a time. In
case you wanted to manually move it, you can either drag the layer
as you did with the Apple Layer or you can use your arrow keys to
nudge it one pixel at a time.
That's basically it. Just repeat step
26 for the other two layers and you're finished!
Preview In Browser
to test your page or click
here to view my version.
|
  |
|