 |
|
|
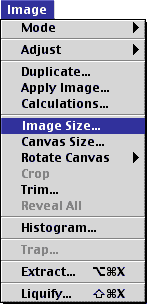
Resizing Images In Photoshop 6Step 1. Open the image you want to resize Step 2. Adjust the image's size by going up to Image>Image Size...
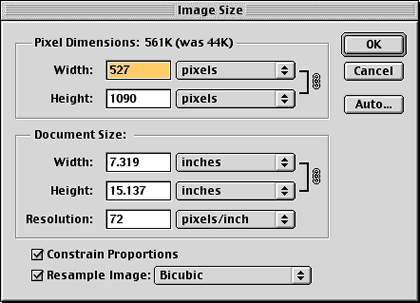
Step 3. Check the image resolution. Be sure your Resolution is set to 72 if you're outputting your image for the web. Your image will be much too large for the web if it's set to anything higher. If your Resolution was set to something higher than 72, you will notice that the image will automatically be resized once you change the Resolution to 72 if Resample Image is selected. To adjust the Resolution of your image without affecting the image size, uncheck the Resample Image option.
Resolution refers to how many dots per inch (DPI) or pixels per inch (PPI). Web Resolutions are always set to 72 since that is the maximum your computer monitor can display. Print values for Resolution range from 150 and greater. Another reason not to use higher Resolutions than 72 for the web is file size. An image with a Resolution set to say 300 has about 4 times as much information in it. This is important for print media because of the level of detail needed to produce an acceptable print, however, that same image would be much too large of a download for someone to wait for. And since the majority of people on the Internet are using 56k modems, you need to design your images for that audience. Step 4. When the Image Size dialog box opens, you can input the new sizes you want for your image. Be sure to have Constrain Proportions selected. This will ensure the ratio of height to width are maintained and will prevent your image from being distorted or unevenly resized.
|
|
|||||||||
| Home | Dreamweaver | Fireworks | Flash | Photoshop | Elements | PowerPoint| Ebay | QuickTime Pro | Flash 5 CD | Fireworks MX CD | QuickTime Support | Contact Copyright © 1999-2015 CBT Cafe, All rights
reserved CBT Cafe | Multimedia Learning | Interactive Graphics
|

