 |
|
|
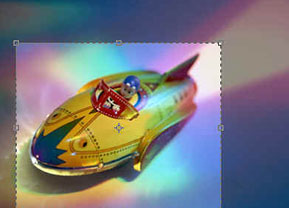
Photoshop: Cropping ImagesThis is a technique you'll use a lot when working with images. It's very simple. Cropping refers to cutting down an image by cutting away unwanted parts. Cropping, unlike Image Resizing, does not affect resolution or quality. It just cuts away parts of the image you don't need or want. Step 1: Getting StartedOpen an image or graphic
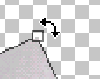
Step 2: Selecting the Crop Tool
To move the selection, simply move your cursor inside the selection until you see the solid arrow and then click and drag to reposition.
To crop the selection, double-click inside the selection or click the Check Mark Button up top in the Options Bar.
|
|
|||||||||||


| Home | Dreamweaver | Fireworks | Flash | Photoshop | Elements | PowerPoint| Ebay | QuickTime Pro | Flash 5 CD | Fireworks MX CD | QuickTime Support | Contact Copyright © 1999-2015 CBT Cafe, All rights
reserved CBT Cafe | Multimedia Learning | Interactive Graphics
|