 |
|
|
CBT Cafe > Fireworks > Menus, Buttons & Animations
Step 7: Creating the Second Animation
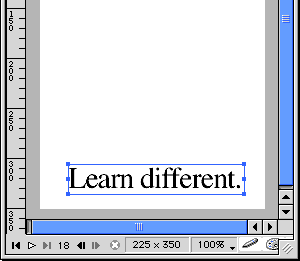
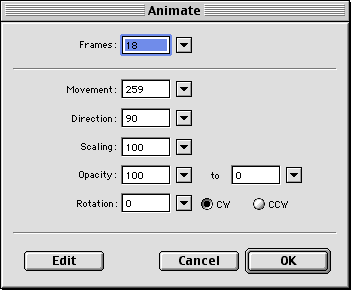
Step 8: Animating the New Text
Click OK once you have the settings you like. The alert will come up again telling you that more frames will be added.
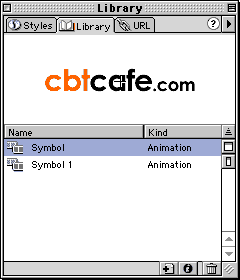
Step 9: Testing the AnimationUsing the Play button at the bottom of your document test your animation. You can also access both of the animations you created in the Library Panel (Window>Library).
Step 10: Optimizing and ExportingIn the Optimize Panel, click Animated Gif and export. This animation is a bit large because of the number of Frames. You'll always be faced with the challenge of including enough frames to make the animation play smoothly while still respecting file size. Generally, an animation of 10 Frames will work best.
|
|
|||||||||||

| Home | Dreamweaver | Fireworks | Flash | Photoshop | Elements | PowerPoint| Ebay | QuickTime Pro | Flash 5 CD | Fireworks MX CD | QuickTime Support | Contact Copyright © 1999-2015 CBT Cafe, All rights
reserved CBT Cafe | Multimedia Learning | Interactive Graphics
|